
Starting a blog can feel overwhelming, especially when you’re staring at countless hosting options and technical jargon. But here’s the truth: starting a blog with Bluehost and WordPress doesn’t have to be complicated. In fact, with the right guidance, you can go from zero to a live blog in just 15 minutes.
This comprehensive guide will walk you through every single step of how to start a blog with Bluehost, complete with screenshots, expert tips, and everything you need to launch your blogging journey successfully. Whether you’re looking to make money blogging or simply share your passion with the world, this is the last guide you’ll ever need.
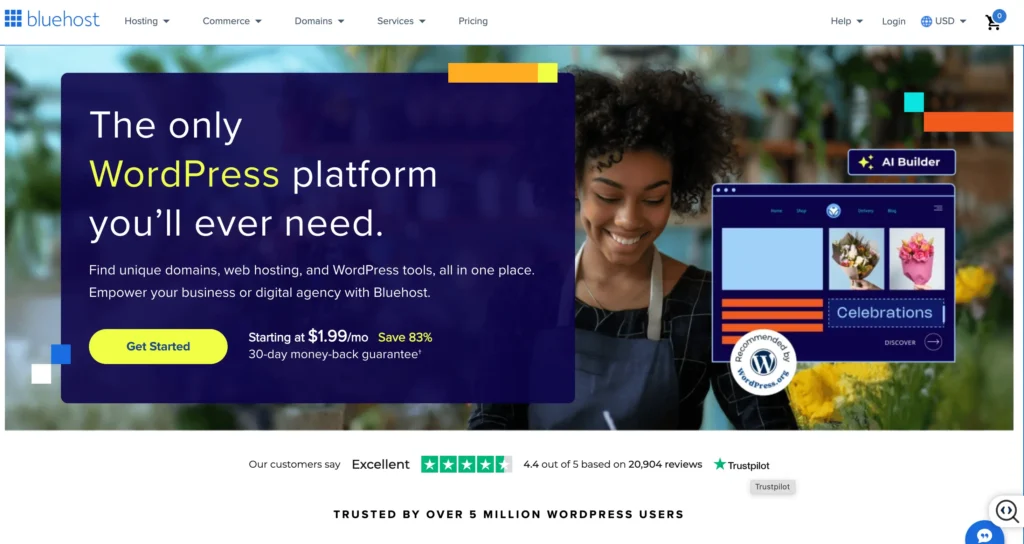
Why Choose Bluehost for Your Blog?
Before diving into the setup process, let’s address the elephant in the room: is Bluehost good for a blog? The answer is a resounding yes, and here’s why:
- WordPress Recommended: Bluehost is officially recommended by WordPress.org
- Beginner-Friendly: Intuitive control panel and one-click WordPress installation
- Affordable Pricing: Plans start as low as $2.95/month
- 24/7 Support: Round-the-clock customer service when you need help
- Free Domain: Get your first domain name free for one year
Ready to get started? Click here to access Bluehost’s special pricing and save up to 60% on your hosting plan.
Part 1: The Setup (The First 10 Minutes)
Step 1: Go to Bluehost and Click “Get Started”
The first step in learning how to create a blog on Bluehost is visiting their website and initiating the signup process.
- Visit Bluehost: Click here to go to Bluehost
- Click “Get Started”: You’ll see this prominent blue button on their homepage
- Choose Your Plan: This leads us to our next crucial step
Expert Tip: Opening the link in a new tab allows you to follow along with this guide while completing the setup process.
Step 2: Choosing The Right Bluehost Plan (Basic vs. Choice Plus Explained)
This is where many beginners get confused. Let me break down each Bluehost blog hosting plan:
| Plan | Price | Best For | Key Features |
|---|---|---|---|
| Basic | $2.95/month | Single blog | 1 website, 50GB storage |
| Choice Plus | $5.45/month | Growing bloggers | Unlimited websites, unlimited storage, domain privacy |
| Online Store | $13.95/month | E-commerce | Online store features, dedicated IP |
Why We Recommend ‘Choice Plus’ for New Bloggers
While the Basic plan seems attractive, the Choice Plus plan offers significantly more value:
- Domain Privacy Protection (worth $11.88/year)
- Unlimited websites (perfect if you want to start multiple blogs)
- Unlimited storage and bandwidth
- $200 in marketing credits
Read : What Is Bluehost and How Does It Work? ( 2025 Beginner Guide)
Understanding the 12 vs. 36-Month Pricing Trick
Here’s something most guides won’t tell you: Bluehost’s advertised low prices require a longer commitment. The $2.95/month price is only available with a 36-month subscription. Here’s the honest breakdown:
- 12 months: $7.99/month
- 24 months: $5.99/month
- 36 months: $2.95/month
My recommendation: If you’re serious about blogging, go with the 36-month plan to lock in the lowest rate.
Start your Bluehost blog today with this special discount
Step 3: Setting Up Your Domain Name
Your domain name is your blog’s address on the internet. Here’s how to choose and set it up:
Choosing Your Perfect Domain Name
- Keep it short and memorable
- Use your blog’s main topic or your name
- Avoid hyphens and numbers
- Choose .com when possible
What to Do if Your First Choice is Taken
Don’t panic! Here are some alternatives:
- Add a modifier: “myblog” becomes “mylifeblog” or “myblogdaily”
- Try different extensions: .net, .org, or .blog
- Use a domain name generator: Tools like NameMesh can help
- Get creative with synonyms: “cooking” could become “culinary” or “kitchen”
Already Have a Domain?
If you already own a domain, select “I have a domain name” and enter your existing domain. You’ll need to update your nameservers later.
Step 4: Creating Your Account & Finalizing Package Details
Now comes the account creation process. Fill in your information accurately:
- Account Information: Use your real details for billing
- Package Information: Double-check your selected plan and term length
The Package Extras: Which Ones Do You Actually Need?
Bluehost will offer several add-ons. Here’s my honest assessment:
| Add-on | Price | Do You Need It? | Why/Why Not |
|---|---|---|---|
| Domain Privacy | $11.88/year | YES (if not included) | Protects your personal info |
| SiteLock Security | $23.88/year | NO | WordPress has built-in security |
| CodeGuard Backup | $35.88/year | MAYBE | Good for peace of mind, but manual backups work too |
| SEO Tools | $12.99/year | NO | Free alternatives like Yoast are better |
Money-saving tip: Uncheck the extras you don’t need. You can always add them later if necessary.
Step 5: Completing Your Purchase and Creating Your Password
- Enter payment information: Credit card or PayPal
- Create a strong password: Mix of uppercase, lowercase, numbers, and symbols
- Review and submit: Double-check everything before clicking “Submit”
Congratulations! You’ve just secured your web hosting. Want to get started with the same hosting I recommend?
Read : What Is Bluehost and How Does It Work? ( 2025 Beginner Guide)
Part 2: Bringing Your Blog to Life
Step 6: The Initial Bluehost Setup Wizard
After purchase, Bluehost will guide you through their setup wizard:
- Choose “Create a new website”
- Select “WordPress” as your platform
- Pick a theme (don’t worry, you can change this later)
- Enter your site name and tagline
Expert Tip: Your site name should reflect your blog’s main topic. Your tagline should be a brief description of what visitors can expect.
Step 7: Choosing a WordPress Theme (For Now)
WordPress themes control how your blog looks. For beginners, I recommend these free options:
- Astra: Fast, customizable, and SEO-friendly
- Kadence: Modern design with lots of flexibility
- GeneratePress: Lightweight and professional
- Twenty Twenty-Four: WordPress’s latest default theme
Remember: You can change your theme anytime, so don’t stress about this decision.
Step 8: Welcome to Your WordPress Dashboard!
Once WordPress is installed, you’ll see your dashboard. Here are the key areas:
- Posts: Where you’ll write your blog posts
- Pages: For static content like “About” and “Contact”
- Appearance: Customize themes, menus, and widgets
- Plugins: Add functionality to your blog
- Settings: Configure your blog’s basic settings
Phase 3: What’s Next? (Your First Steps After Setup)
Most guides stop once your blog is live, but that’s where the real work begins! Here’s exactly what to do next:
Your First 5 Essential Settings
1. Setting Your Site Title & Tagline
Navigate to Settings > General and update:
- Site Title: Your blog’s name
- Tagline: A brief description of your blog’s purpose
2. Changing Your Permalinks to “Post Name” (Crucial for SEO!)
This is critical for SEO. Go to Settings > Permalinks and select “Post name”. This makes your URLs look like: yourblog.com/your-post-title instead of yourblog.com/?p=123
3. Setting Your Timezone
In Settings > General, set your timezone to match your location.
4. Deleting Default Posts/Pages
WordPress comes with sample content. Delete:
- The “Hello World” post (in Posts)
- The sample page (in Pages)
- Sample comments
5. Configuring Comments
Decide if you want comments enabled. Go to Settings > Discussion to configure comment settings.
Installing 3 Essential (and Free) Plugins
Plugins extend your blog’s functionality. Here are three must-haves:
1. An SEO Plugin
Recommendation: Yoast SEO (Free)
- Helps optimize your posts for search engines
- Provides readability analysis
- Generates XML sitemaps automatically
2. A Caching Plugin
Recommendation: WP Super Cache (Free)
- Makes your blog load faster
- Improves user experience
- Helps with SEO rankings
3. An Anti-Spam Plugin
Recommendation: Akismet (Free for personal use)
- Filters spam comments automatically
- Comes pre-installed with WordPress
- Just needs activation and API key
To install plugins: Go to Plugins > Add New, search for the plugin name, click “Install Now”, then “Activate”.
Writing and Publishing Your First Blog Post
Ready to publish your first post? Here’s how:
- Go to Posts > Add New
- Add your title in the title field
- Write your content using the block editor
- Add an image by clicking the “+” button and selecting “Image”
- Preview your post using the “Preview” button
- Publish when you’re ready!
First post ideas:
- An introduction post about yourself and your blog
- Your blog’s mission and what readers can expect
- A helpful tip related to your niche
Creating Your Two Must-Have Pages
Every professional blog needs these pages:
About Page
- Tell your story
- Explain why you started blogging
- Share your expertise and credentials
- Include a professional photo
Contact Page
- Provide ways for readers to reach you
- Consider adding a contact form plugin
- Include social media links
- Set expectations for response times
To create pages: Go to Pages > Add New, write your content, and publish.
Taking Your Blog to the Next Level
Making Money Blogging: Your Options
Once your Bluehost blog is established, here are proven ways to make money blogging:
- Affiliate Marketing: Promote products you love and earn commissions
- Sponsored Posts: Partner with brands for paid content
- Digital Products: Sell courses, eBooks, or templates
- Display Advertising: Use platforms like Google AdSense
- Coaching/Consulting: Monetize your expertise directly
Essential Tools for Blog Growth
- Google Analytics: Track your blog’s performance
- Google Search Console: Monitor your SEO progress
- Canva: Create stunning graphics for your posts
- Mailchimp: Build an email list of subscribers
Troubleshooting Common Issues
“This site can’t be reached” Error
- Wait 24-48 hours: DNS propagation takes time
- Clear your browser cache
- Try accessing from a different device
WordPress Login Issues
- Check your email: Bluehost sends login credentials
- Reset your password: Use the “Lost Password” link
- Contact Bluehost support: They’re available 24/7
Slow Loading Times
- Install a caching plugin
- Optimize your images before uploading
- Choose a lightweight theme
Final Thoughts: Your Blogging Journey Starts Now
Congratulations! You now know exactly how to start a blog with Bluehost and WordPress. You have a live blog, essential plugins installed, and a clear roadmap for what comes next.
Remember, successful blogging isn’t just about the technical setup – it’s about consistently creating valuable content for your audience. Focus on helping your readers, and success will follow.
Ready to start your blogging journey? Get started with Bluehost today using our exclusive discount and join thousands of successful bloggers who chose Bluehost as their hosting partner.
Quick Action Steps:
- Sign up for Bluehost hosting
- Choose your domain name
- Install WordPress (automatic with Bluehost)
- Configure your essential settings
- Write and publish your first post
Questions about starting your blog? The Bluehost support team is available 24/7 to help you succeed. Start your blog today and take the first step toward sharing your voice with the world.
This guide was last updated in 2024 and reflects the current Bluehost interface and WordPress features. Pricing and features may change over time.